Having a website is essential for any business or individual. However, accidents can happen, and you may end up losing all of your website’s data due to unforeseen events. That’s where backups come in. Backups act as a safety net, protecting your website and its data against data loss, security breaches, and other unforeseen events.
Creating backups manually can be time-consuming and may include errors. That’s why many website owners prefer automated backups as a time-saving and reliable solution. UpdraftPlus is a popular and trusted backup plugin for WordPress that allows you to set up automated backups with ease. We’ll take you through the process of setting up automated backups with UpdraftPlus. So, let’s get started!
Install and Activate UpdraftPlus:
The first step is to install and activate the UpdraftPlus plugin on your WordPress website.
- Log in to your WordPress admin dashboard.
- Navigate to ‘Plugins‘ > ‘Add New‘.
- Search for “UpdraftPlus” in the plugin search bar.
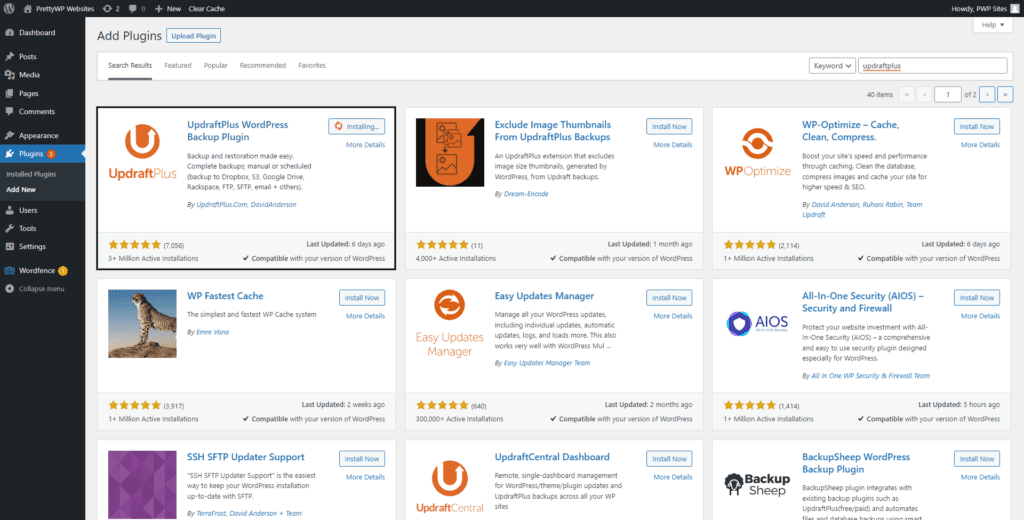
- Locate UpdraftPlus and click “Install Now“.
- Once installed, click “Activate” to activate the plugin.
Access UpdraftPlus Settings
After activating the plugin, you’ll need to navigate to the UpdraftPlus settings. You will find a new menu item labeled “UpdraftPlus Backups” in the sidebar of your WordPress admin dashboard. Click on it.
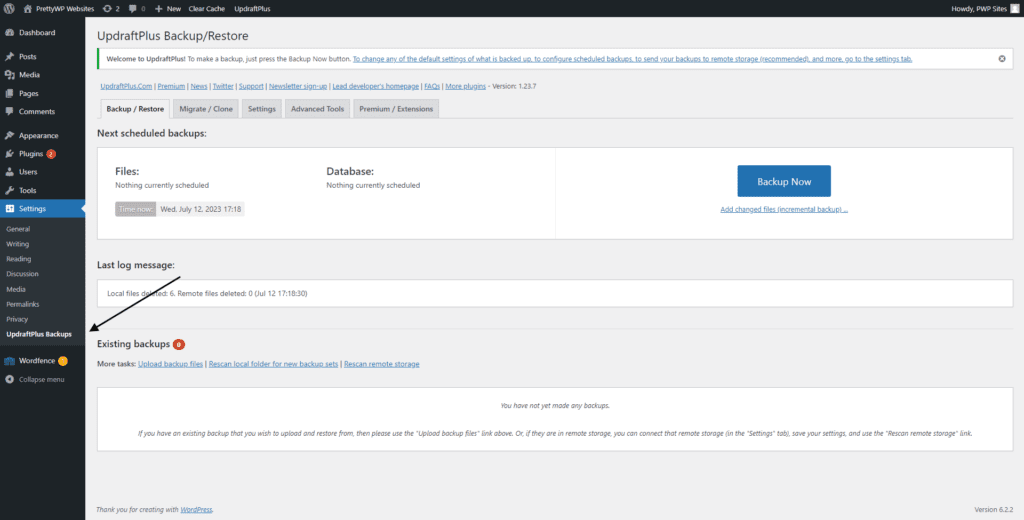
This will take you to the UpdraftPlus settings page, where you can configure backup options and schedules.
Choose Backup Schedule
The next step is to choose the backup schedule. You can select the backup frequency and the number of backups to be retained. UpdraftPlus offers several options, including daily, weekly, monthly, and custom backup schedules.
For example, if you choose the daily backup schedule, UpdraftPlus will automatically create a backup of your website every day at a specific time. You can also choose to retain a certain number of backups, which will be saved on your server.
- On the UpdraftPlus settings page, you will find the ‘Settings‘ tab. Click on it.
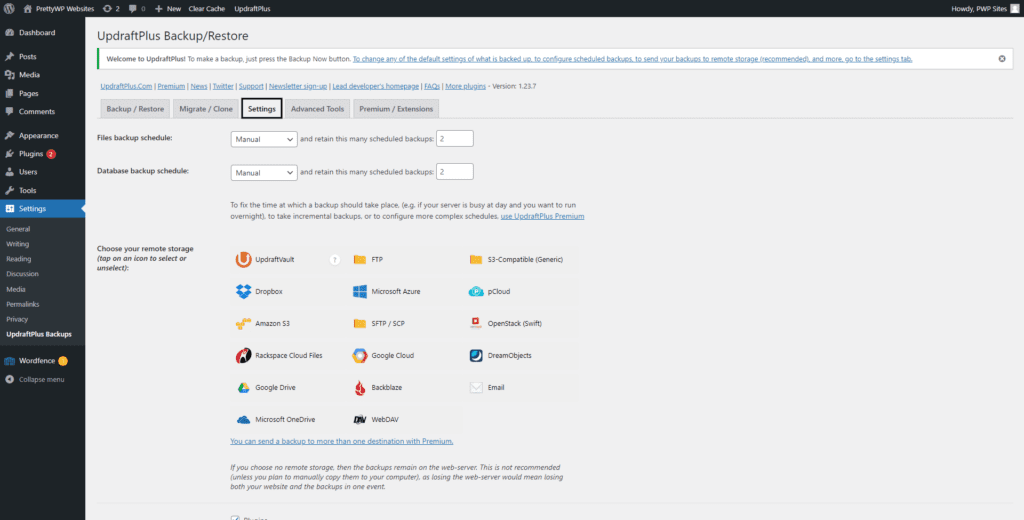
- Under the “Files Backup Schedule” section, select the frequency for your backups: daily, weekly, or monthly. Choose the option that best suits your needs.
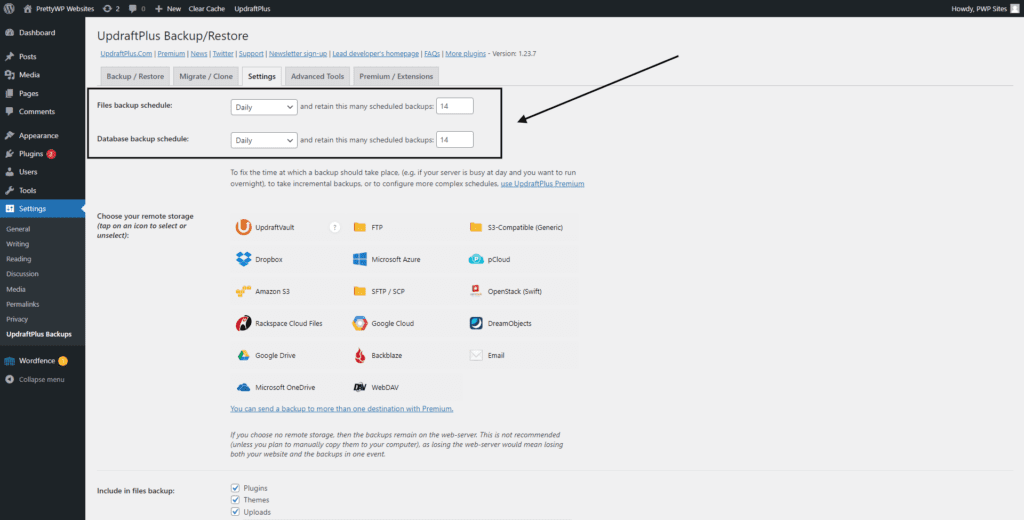
- Adjust the time and day settings according to your preferences. For example, if you select weekly backups, you can choose the specific day and time when the backups should be initiated.
Select Backup Contents
UpdraftPlus also allows you to select which contents to backup. You can choose to backup your entire website or select specific files and databases to backup.
- In the “Include in files backup” section, you can choose which components of your website you want to include in the backups. By default, UpdraftPlus backs up all files and databases.
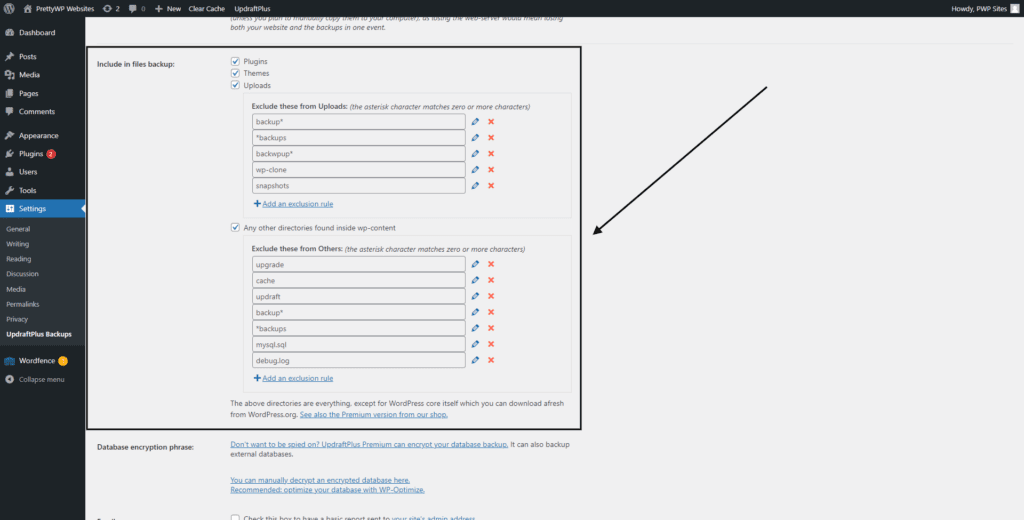
- If you wish to exclude certain files or folders from the backups, you can specify them in the “Exclude these from Uploads” and “Exclude these from Others” fields.
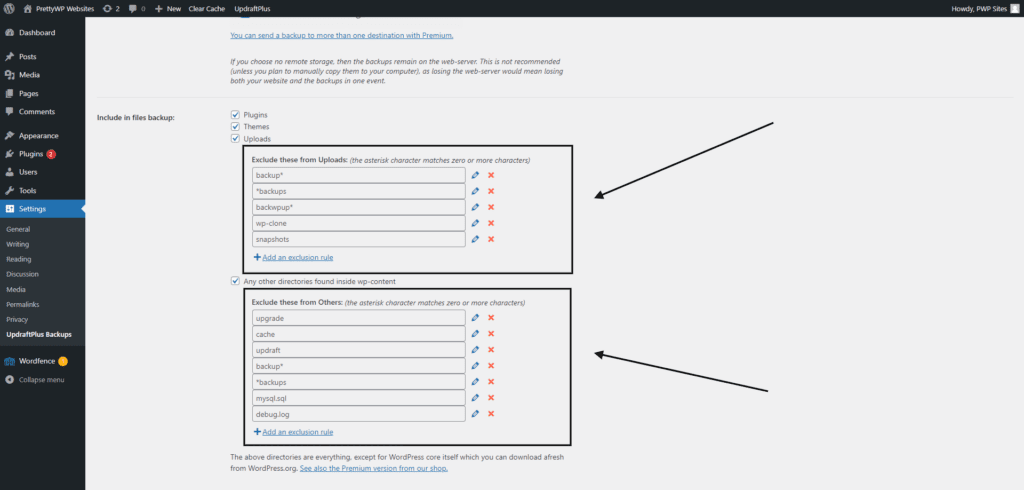
By selecting specific files and databases to backup, you can save storage space and reduce backup time. You can also exclude unnecessary files and databases from the backup process.
Configure Remote Storage
UpdraftPlus allows you to choose your preferred backup destination. You can select from various cloud storage options such as Dropbox, Google Drive, Amazon S3, and more. You can also choose to store backups on your server or download them to your local computer.
- In the “Choose your remote storage” section, select the cloud storage service of your choice, such as S3, Google Drive, Dropbox, and more.
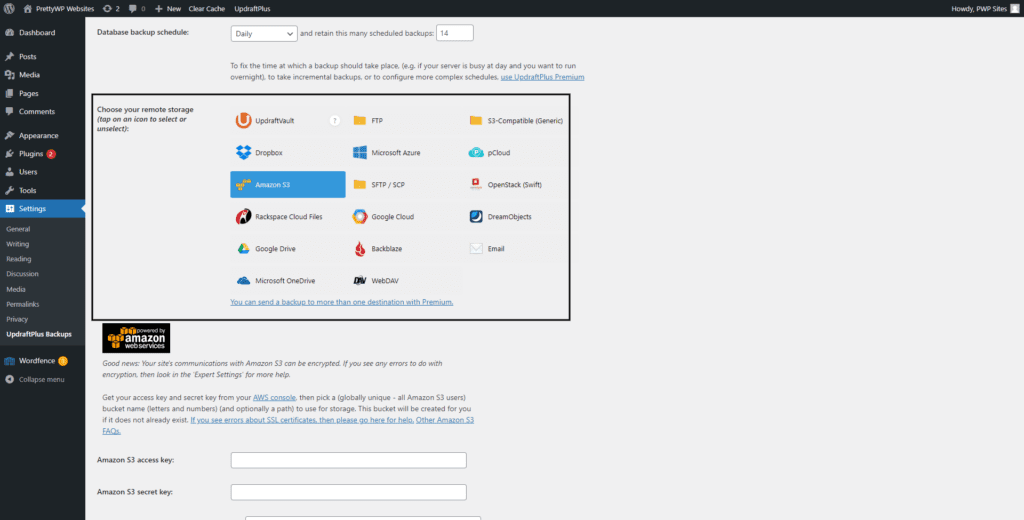
- Follow the on-screen instructions to connect UpdraftPlus with your chosen cloud storage service and authorize the plugin to access the storage.
Save Settings and Initiate a First Backup
After configuring your backup settings, you need to save the changes and run your first backup. You can do this by clicking on the “Save Changes” button and then “Backup Now.” UpdraftPlus will start the backup process, and you can monitor the progress on the screen.
Check Backup Status and Restore Points
In case of any data loss or website issues, you can restore your website from the backups created by UpdraftPlus.
- To check the status of your backups, navigate to the “Backup/Restore” tab on the UpdraftPlus settings page.
- Here, you can view the date and time of the last backup, the storage location (your connected cloud storage), and the size of the backup files.
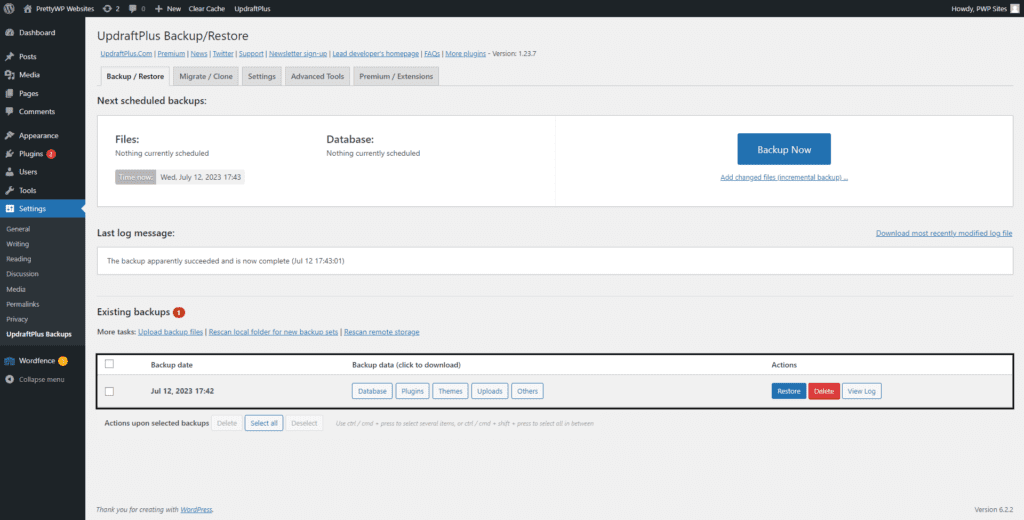
- UpdraftPlus also keeps restore points, which allow you to restore your website to a previous state if needed. You can access the restore points under the “Existing backups” tab.
Final Thoughts
So, backing up your website is crucial to ensure its safety and security. It is always better to be safe than sorry, and having a backup in case of any unexpected issues or data loss can save you a lot of time and effort. However, it is important to keep in mind that backups are only as good as their storage and maintenance. Here are some tips to keep your backups safe and secure:
1. Store backups in a secure location: It is important to store backups in a safe and secure location, such as an external hard drive or cloud storage. This will ensure that your backups are protected from any physical damage or loss.
2. Maintain backups regularly: Regular maintenance of backups is crucial to ensure that they are up-to-date and accurate. Make sure to run backups at regular intervals, depending on the frequency of updates and changes to your website.
3. Test backups regularly: It is important to test your backups regularly to ensure that they are functioning properly. This will help you identify any issues or errors before they become a problem.
4. Keep multiple backups: It is always a good idea to keep multiple backups of your website, stored in different locations. This will ensure that you have a backup in case one of them fails or becomes corrupted.
By following these tips, you can ensure that your website backups are secure and reliable. Remember, a little effort in maintaining backups regularly can go a long way in protecting your website and business from any unforeseen issues or disasters.